


Just imagine the tremendous growth the industry could experience if the development experience were significantly improved, leading to increased participation and innovation. This is precisely the vision behind Scrypto language.
Scrypto is an asset-oriented smart contract language developed by Radix, the language is built upon Rust. Scypto retains most of Rust's features while introducing additional functions and syntax for Radix Engine v2. With its asset-oriented nature, Scrypto enables interaction with resources like tokens within the language.
The primary objective of Scrypto is to minimize the time it takes for developers to build their first successful decentralized application (dApp). By offering a more streamlined and efficient development process, Scrypto aims to remove barriers and empower developers to rapidly create innovative dApps.
Getting your local environment ready for Scrypto
In this guide, I will walk you through the necessary steps to get your local environment ready for Scrypto. The first step will be to:
Step 1: Install Rust
If you already have Rust installed on your system, it is recommended to upgrade it to version Rust 1.60+ as this is the version Scrypto requires. Use the command rustup update in your terminal or command prompt.
Download the Rust installer using this link: rustup-init.exe . Now once the installer is downloaded, locate it on your computer and double-click to run.
You will then be prompted to select one of the following three options inside your terminal:

Choose "Proceed with installation (default)" to get the most recent stable version of Rust installed on your machine.
This is what you would have if your installation was successful:

Run the command rustc --version in your terminal if you still want to ensure that Rust is properly installed. The version number ought to be displayed as follows:

Step 2: Install "Desktop development with C++" with Build Tools for Visual Studio 2019
Download the Visual Studio 2019 installer using this link: Build Tools for Visual Studio 2019 . Once the installer is downloaded, run it to start the Visual Studio Installer.
In the Visual Studio Installer window, select "Desktop development with C++" from the available workloads:
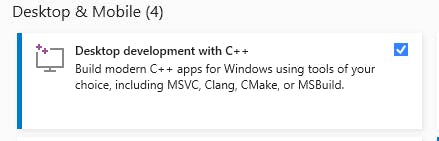
Next, Click on the "Install" button to begin the installation process and the installer will download and install the necessary components for "Desktop development with C++.
Once the installation is complete, you can launch Visual Studio 2019 and can start using the C++ development tools.
Step 3: Install LLVM 13.0.1
Follow this link to download the installer file: LLVM 13.0.1. Once the download is complete, locate the downloaded file on your system and double-click to run.
Next, follow all instructions to complete the installation but make sure you tick the option that adds LLVM to the system PATH like this:

Step 4: Configure Rust for WebAssembly development
Start a new PowerShell and run the following command to add WebAssembly target:
rustup target add wasm32-unknown-unknown
By adding the WebAssembly target to the Rust toolchain, you are configuring Rust to support the compilation of code into WebAssembly.
Step 5: Install Simulator
To install Simulator we first have to clone the Radix Distributed Ledger Technology (DLT) Scrypto GitHub directory. Open any terminal of your choice and run the command below to clone this repo:
git clone https://github.com/radixdlt/radixdlt-scrypto.git
Next, cd into the repo:
cd radixdlt-scrypto
And run:
cargo install --path ./simulator
We are now ready to start writing Scrypto Code!
Writing your First Scrypto Code
To get started quickly, you can generate a new project with the following command:
scrypto new-package <package_name>
You can replace <package_name> with whatever name you would like to call your package.
You should now have a directory structure that looks like this:

src/lib.rs is where you will write your package's code while tests/lib.rs is where you will write the unit tests for your blueprints this include testing the correctness of the blueprint logic, evaluating the interaction between blueprint components and so on.
Cargo.toml is your package's manifest. It allows you to set a name, a version and specify the Rust dependencies.
Now open src/lib.rs.
use scrypto::prelude::*;

#[blueprint]
mod hello {
    struct Hello {
        // Define what resources and data will be managed by Hello components
        sample_vault: Vault,
    }

    impl Hello {
        // Implement the functions and methods which will manage those resources and data

        // This is a function, and can be called directly on the blueprint once deployed
        pub fn instantiate_hello() -> Global<Hello> {
            // Create a new token called "HelloToken," with a fixed supply of 1000, and put that supply into a bucket
            let my_bucket: Bucket = ResourceBuilder::new_fungible(OwnerRole::None)
                .metadata(metadata! {
                    init {
                        "name" => "HelloToken".to_owned(), locked;
                        "symbol" => "HT".to_owned(), locked;
                    }
                })
                .mint_initial_supply(1000);

            // Instantiate a Hello component, populating its vault with our supply of 1000 HelloToken
            Self {
                sample_vault: Vault::with_bucket(my_bucket),
            }
            .instantiate()
            .prepare_to_globalize(OwnerRole::None)
            .globalize()
        }

        // This is a method, because it needs a reference to self.  Methods can only be called on components
        pub fn free_token(&mut self) -> Bucket {
            info!(
                "My balance is: {} HelloToken. Now giving away a token!",
                self.sample_vault.amount()
            );
            // If the semi-colon is omitted on the last line, the last value seen is automatically returned
            // In this case, a bucket containing 1 HelloToken is returned
            self.sample_vault.take(1)
        }
    }
}
I'll be giving a detailed explanation of what is happening in the above snippet. Now let us first start with what this src file is all about, what does it do?
This src file creates a "hello" blueprint, within which we define a component responsible for generating an initial supply of tokens from there these tokens will be freely given to any caller who requests them until the supply of tokens is completely used up or exhausted.
A caller in this context refers to any entity or code that requests or asks for a token from the component. The caller could be another part of the code, a function, a module, or any other component that interacts with the system or uses the functionality provided by the blueprint.
We include this use scrypto::prelude::*; at the top of every single package we create and this is basically what gets us everything we need for scrypto.
Now, let's move on to the BluePrint section, a package can contain one or more blueprints but in the case of our src file we have just one which is the hello blueprint:
#[blueprint]
mod hello {
...
}
And then this blueprint itself has two sections the first is where we define our struct Hello
    struct Hello {
        // Define what resources and data will be managed by Hello components
        sample_vault: Vault,
    }
This is where we determine what elements we'll be handling, such as tokens or simple data values like integers. In our case, we will focus on a single entity called a "vault," which we will refer to as the "sample vault."
The second section of this is our implementation of hello blueprint where we define the functions and methods that can be used to manipulate and utilize the state stored in the Hello struct.
pub fn instantiate_hello() -> Global<Hello> {
            // Create a new token called "HelloToken," with a fixed supply of 1000, and put that supply into a bucket
            let my_bucket: Bucket = ResourceBuilder::new_fungible(OwnerRole::None)
                .metadata(metadata! {
                    init {
                        "name" => "HelloToken".to_owned(), locked;
                        "symbol" => "HT".to_owned(), locked;
                    }
                })
                .mint_initial_supply(1000);

            // Instantiate a Hello component, populating its vault with our supply of 1000 HelloToken
            Self {
                sample_vault: Vault::with_bucket(my_bucket),
            }
            .instantiate()
            .prepare_to_globalize(OwnerRole::None)
            .globalize()
        }
In this function We used the resource builder, a built-in feature in Scrypto, to create a new fungible token and set its maximum divisibility. This value can be considered the default for the token.
Next, to create the initial supply of a thousand tokens, we provide metadata such as the name and symbol for easy reference and this step finalized the creation of the initial token supply.
However, these tokens cannot simply exist as a standalone variable; they need to be contained within a container, either a bucket or a vault. In this case, we used a temporary container called "my bucket," which is of type bucket. It holds the token supply.
Once the token supply was within the bucket, we proceeded to instantiate the "Hello" component within its implementation, the "self" keyword acts as a shorthand reference to the hello struct.
The only remaining task in the hello struct setup was to establish the sample vault. We accomplished this by creating a new vault using the bucket we had.
It is essential to note that once a vault is instantiated, it can only hold a single type of resource. In this case, the vault will exclusively contain "Hello" tokens. Any attempt to store a different type of resource in the vault will result in a runtime error.
Finally, with the setup complete, we proceeded to instantiate the hello component, creating it on our ledger simulator.
    // This is a method, because it needs a reference to self.  Methods can only be called on components
        pub fn free_token(&mut self) -> Bucket {
            info!(
                "My balance is: {} HelloToken. Now giving away a token!",
                self.sample_vault.amount()
            );
            // If the semi-colon is omitted on the last line, the last value seen is automatically returned
            // In this case, a bucket containing 1 HelloToken is returned
            self.sample_vault.take(1)
        }
Now here we have a method named free_token that can only be called on a component. The method is marked as mutable( $mut) because it intends to change the state of the component and that is to give away one token so a mutable reference to the component itself (self) is required.
However, if we are to create a method that does not intend to change the state, such as a method to retrieve the token balance then a mutable reference is not necessary.
The method includes an info line for printing details about the upcoming action. Then, the take operation is performed on the vault, resulting in a bucket containing a single hello token. As this is the last expression in the method, it is automatically returned.
The goal is to return one hello token to the caller without concerning ourselves with what the caller will do with it.
In Scrypto, the pattern is to compose transactions by passing around buckets of resources. The free token method simply puts the token in a bucket, emits that bucket, and allows the caller to handle it as they wish. They can store it in an account they control or chain it into another call to another component within the same transaction.
Deploy and Test Your Code
In this section of this article, we'll deploy and test our code.
We first need to build and deploy the blueprint, cd into your project directory and run the following command:
resim publish .
The "publish" command carries out two important tasks when it is executed. It begins by creating the blueprint's code, making sure it is compiled and prepared for deployment. Second, it makes the blueprint usable by deploying the compiled code to the ledger.
Upon successful deployment, the "publish" command will return the address of the deployed blueprint. It is essential to save this address in a secure location as it will be needed in subsequent steps or when interacting with the deployed blueprint.
resim call-function [your_blueprint_address] Hello instantiate_hello
Upon execution, this code snippet will output two addresses: one for the newly created ResourceDef and another for the instantiated component:

Now that we have a component, we can call its method free_token which should give us one HelloToken:
resim call-method [component_address] free_token
If you now look at the resources at your account's address, you should see the new token:
Where do you go next?
Now that you've learned how to write and deploy your first token, using the Scrypto language: